Uploading HTML templates to Bluehost can be tiring if you're trying to upload every single file using the 'File Manager' on Bluehost Dashboard. File Manager helps you upload one file at a time so it would be messed up if you'd want to upload an entire HTML Template with hundreds of files.
Looking forward to this, you'd need a FTP (File Transfer Protocol) client that you could use to upload bulk files on your web server.
Bluehost is the leading hosting company out there with tons of benefits that I have talked about on various occasions and it's the one I use for BloggingeHow's Subdomains. If you're new and would like to setup your own blog/website, you can read my detailed guide that would help you get started easily.
Back to the talk, you simply need to follow the steps below in order to upload your HTML Template or other files to your bluehost hosting.
Steps To Upload HTML Template/Files to Bluehost Hosting
#1 Download and Install FileZilla FTP Client.
FileZilla is one of the best and Free FTP Client out there that you can use and is also recommended by Bluehost. It's extremely easy to setup with bluehost.
Download FileZilla. Once. the installation is done, follow the next step below.
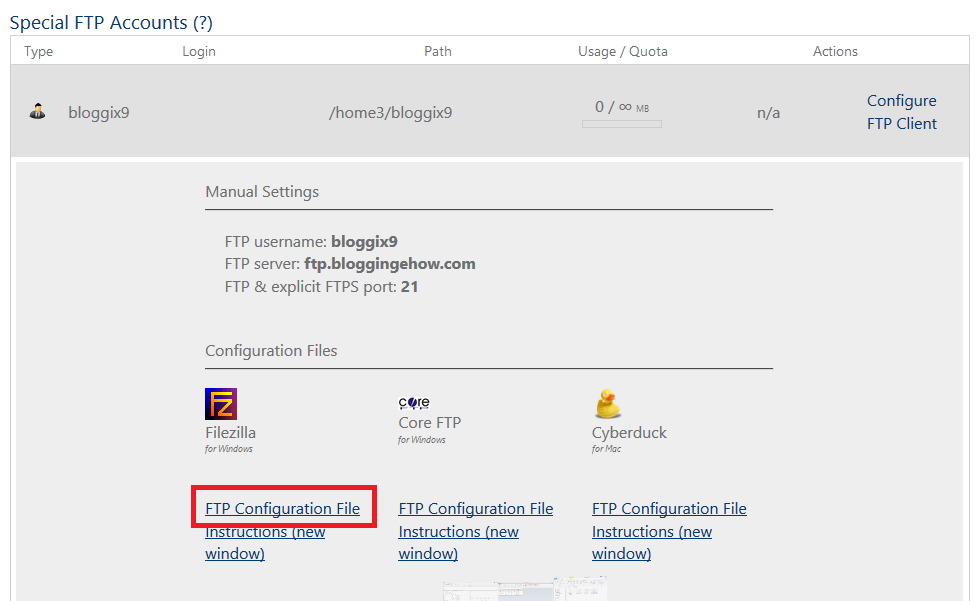
#2 Download Bluehost's FileZilla Configuration File.
This is an XML file that you need to download to make the configuration process easy. Otherwise you'd have to configure manually.
Under "Special FTP Accounts", simply click on "Configure FTP Client" and it would expand more options as shown in the image below.
 |
| 1 |
 |
| 2 |
#3 Open FileZilla and Configure
Open up FileZilla now and click File >> Import and browse the XML Configuration file your download in the previous step.
Once the importing is done, it will start configuration automatically.
#4 Connect Happily!
Time to connect and log in to your server, go to File >> Site Manager or simply click CTRL + S when you're in FileZilla.
This would open up File Manager. Now click on the FTP profile under "My Sites". Take a look at the image below.
NOTE: Generally when you try to connect for the first time, FileZilla would give error connecting due to the fact that your "Host" name would have a domain for your FTP account and not an IP Address as the image shows above.
The simple solution to that is that you'd have to replace that domain e.g (ftp.yoursite.com) and replace with the IP address of your domain.
(To find the IP address of your domain, you'd have to check back to the email you received from Bluehost when you signed up for your hosting. They would have mentioned it under "Temporary URL". Take a look at the image below)
#5 Upload!
Once the connection is made, simply drop the files into the "public_html" folder and it would automatically start uploading.
Hope this short guide helped you out. Leave out your comments if you face any specific problem.
Take care.
Again, if you'd like to setup your blog with Bluehost, the guide below would help you out:


